Network Administrations usually don’t monitor the LAN unless they receive a problem report and several attack occurrences on Layer 2 is not surprising.
So, Yersinia is used as a framework for performing layer 2 attacks which analyzes and tests the deployed network and systems. It consists of various layer 2 attacks for exploiting the weaknesses of different layer-2 protocols. A pentester identifies the vulnerabilities in deep layer 2 of the network which is located in the data link layer like Spanning Tree Protocol (STP) and Cisco Discovery Protocol (CDP). It is used to find the weakness in different network protocols.
Attacks for the following network protocols are implemented in this particular release:
- Spanning Tree Protocol (STP).
- Cisco Discovery Protocol (CDP).
- Dynamic Trunking Protocol (DTP).
- Dynamic Host Configuration Protocol (DHCP).
- Hot Standby Router Protocol (HSRP).
- 802.1q.
- 802.1x.
- Inter-Switch Link Protocol (ISL).
- VLAN Trunking Protocol (VTP).
Yersinia is also able to make Denial Of Service (DOS) attacks on DHCP simple and easy.
DHCP server provides the information needed by the client to run on the network. It provides information like IP address, subnet mask, DNS, default gateway and other information. When a client requests from DHCP server it creates an entry in its DHCP database and assigns the IP address to client.
In DHCP starvation attack client sends so many DHCP Discover messages with fake MAC addresses so that the DHCP pool gets filled and Server is not able to serve valid clients. The DHCP remains unavailable for legitimate users.
After performing the starvation attack, the attacker can set a rogue DHCP server and starts serving the victim machine with fake IP addresses. This way the attacker can perform man in middle attack which captures the client’s request forward them to the server and receives response from the server and send that to the client.
Join me with this article to learn How to Install And Use Yersinia On Kali Linux for DHCP starvation attack.
So, Let’s Begin with the installation process and use of Yersinia!
Install Yersinia on Kali Linux
The first step is to install Yersinia as by default it is not available in the Kali 2020, and it has two versions i.e., Terminal and Graphical. However, it is possible to install Yersinia by typing following single command as shown below on the Kali Linux terminal.
COMMAND: sudo apt-get install yersinia
The following command can be used for downloading its dependencies.
COMMAND: sudo apt-get install
In this attack the DHCP server is flooded with DHCP discover packets with spoofed MAC address. So the DHCP server grants different IP addresses to all requests which fills up the DHCP pool. There after a new legitimate client requesting an IP address will not receive it.
For this attack we have a Kali Linux machine which is the attacker and a Centos machine which is served as the target (DHCP Server) and a Windows machine which is a legitimate client.
Let’s begin with the attack.
1. First type the following command as shown below to start Yersinia. This command will start an interactive ncurses session the interactive mode of Yersinia. The ncurses GUI (yersenia -I) is a ncurses (or curses) based console where the user can take advantage of Yersinia powerful features. The following window opens.
COMMAND: yersinia-I
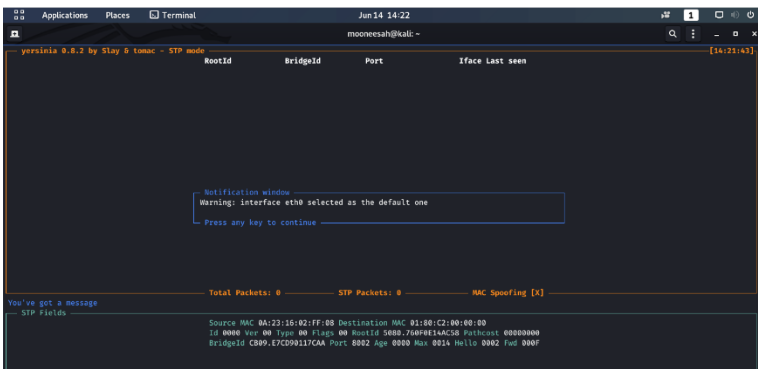
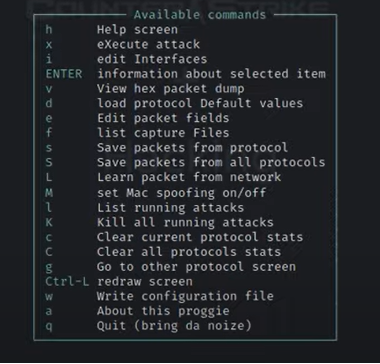
2. The next step is to press the F2 button, the reason this is done is to change the setup i.e., to change from STP mode to DHCP mode and the following screen is shown as shown below. After this press “h” which is for help to see other commands as given in the figure below:
3. As seen from the above image to execute the attack, press X and then following window appears where the sub-attacks needs to be selected.
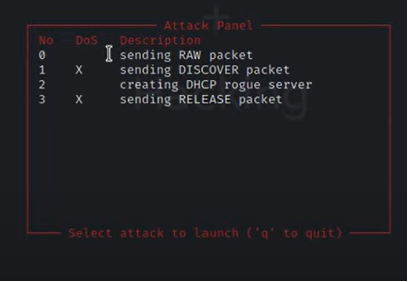
4. In this press “1” for DHCP DoS/Discover attack and the result is shown below.
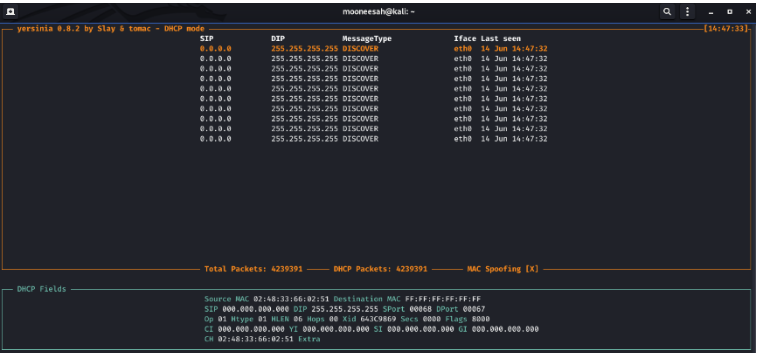
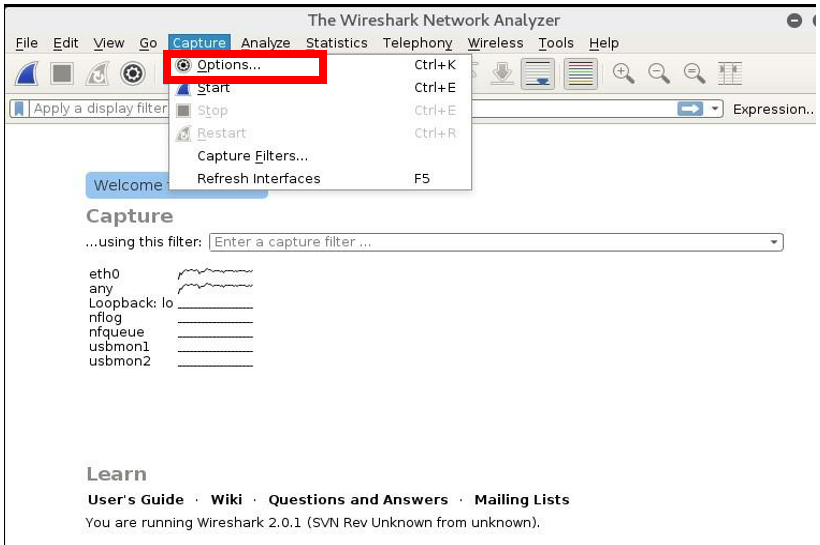
5. It is seen from the above image that all the DHCP discover packets are being sent from the attacker system to the target system. To make this clear check the traffic with Wireshark. So open Wireshark from Kali Linux and the following window shows up.
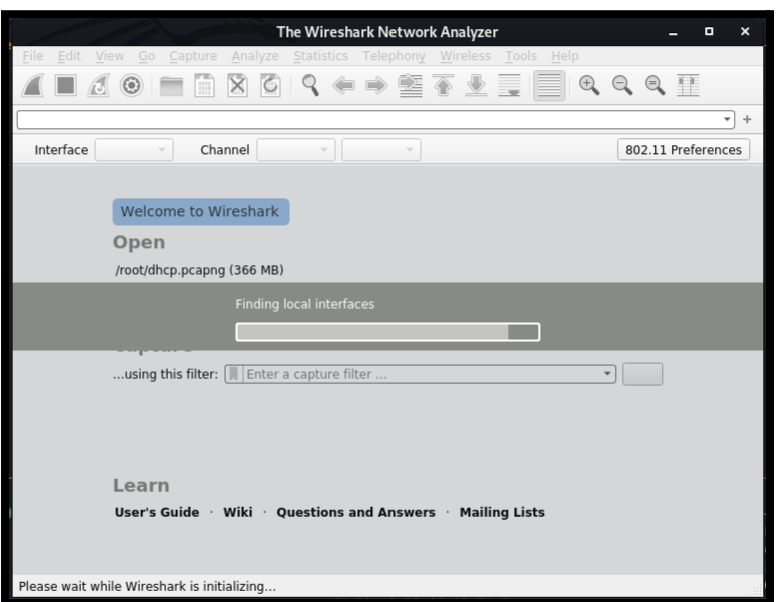
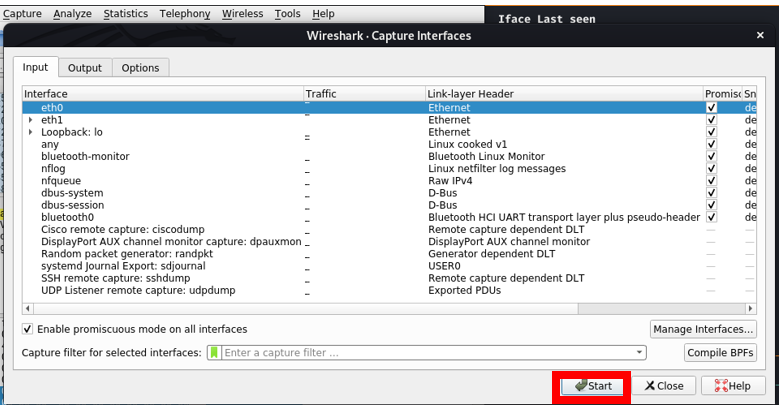
6. From menu, select “Capture” and then click on “Options” button and select “eth0” and then click on start.
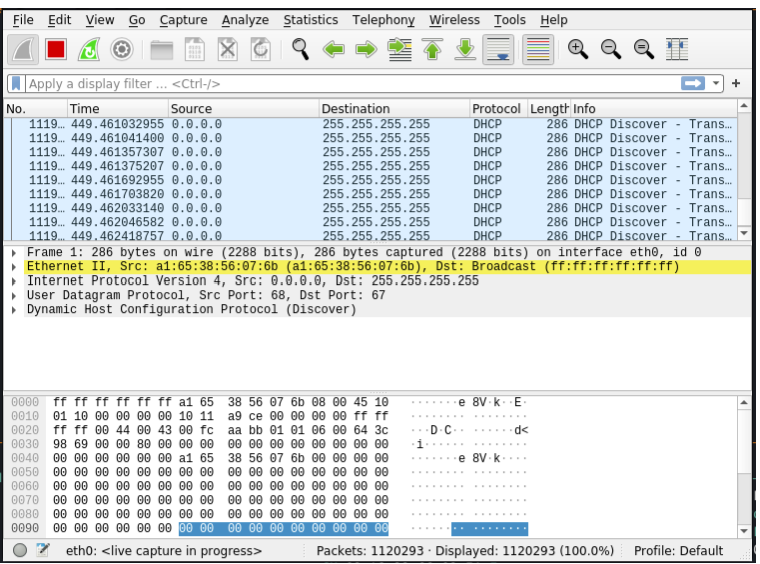
7. From the image below you can see how many DHCP discover packets sent through Yersinia using Wireshark.
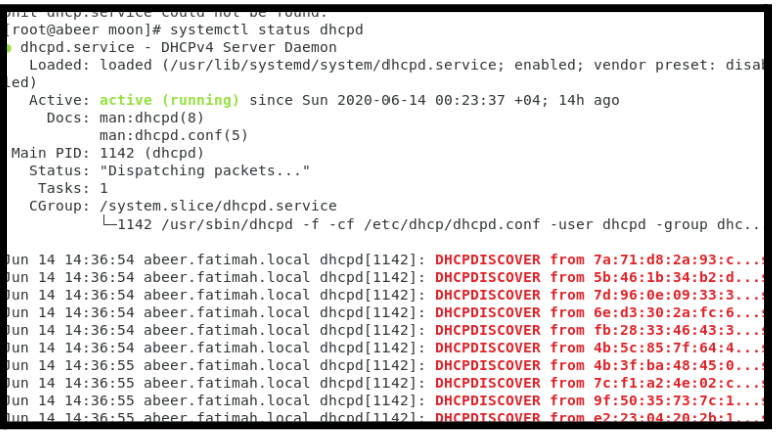
8. Now let’s us see the status of DHCP in the server by typing the following command.
COMMAND: systemctl status dhcp
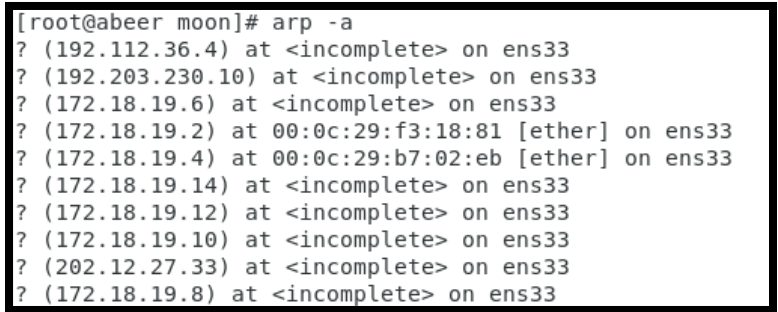
9. Now type the following command to check the reversed IP in DHCP server and the following output is shown.
COMMAND: arp -a
10. Now open Windows machine to get IP address from DHCP server type ipconfig /renew but an error message is shown.
COMMAND: ipconfig
COMMAND: ipconfig /renew

Here you can see that no default IP was there. Meaning all IP’s in the DHCP pool are filled up.
Now cancel the attack to stop and exit by pressing q.